This post may contain affiliate links. I may earn an affiliate commission if you click on a link and purchase an item at no additional cost to you. All opinions are my own.
Don’t lose time waiting for your seedlings to pop up, learn how to pre-sprout seeds! I’ve dabbled with pre-sprouting in the past, but from now on this is the method I’m using!
There are several benefits of pre-sprouting I’ll share and I’ll also give you a simple supply list to get started!
(Before I go on, be sure to follow me on Pinterest and Instagram!)
Pre-sprout vs soil-planted
There is nothing wrong with planting seed directly in the soil. I did both this year depending on the crop, but I much prefer pre-sprouting now! Pre-sprouted seeds will germinate faster because you are consistently providing the main ingredient for germination: moisture.
When starting seeds in a soil mixture, it may dry out or have inconsistent moisture that could cause a delay in sprouting. Your soil could even be too moist and rot the seeds. Pre-sprouting with a damp paper towel provides the ideal environment for germination.
Know what you have
A second benefit of pre-sprouting seeds is that you’ll know exactly how many seedlings you’ll have within just a few days. You don’t have to wait for them to pop through the soil, which can put you behind.
I use heirloom seeds, some of which are 8-10 years old! Pre-sprouting worked even with the old seed, and I was able to see right away which seeds were still viable and which I needed to order more of.
(If you need heirloom seeds, I highly suggest Azure Standard, Baker Creek or Seed Savers Exchange.)
Check daily
Keep in mind when you pre-sprout seeds not all of them will sprout on the same day. I had to check and pull out new seedlings daily, so don’t give up on the seeds that haven’t sprouted even if you only see a couple sprouts at first! They will continue to sprout over a few days time.
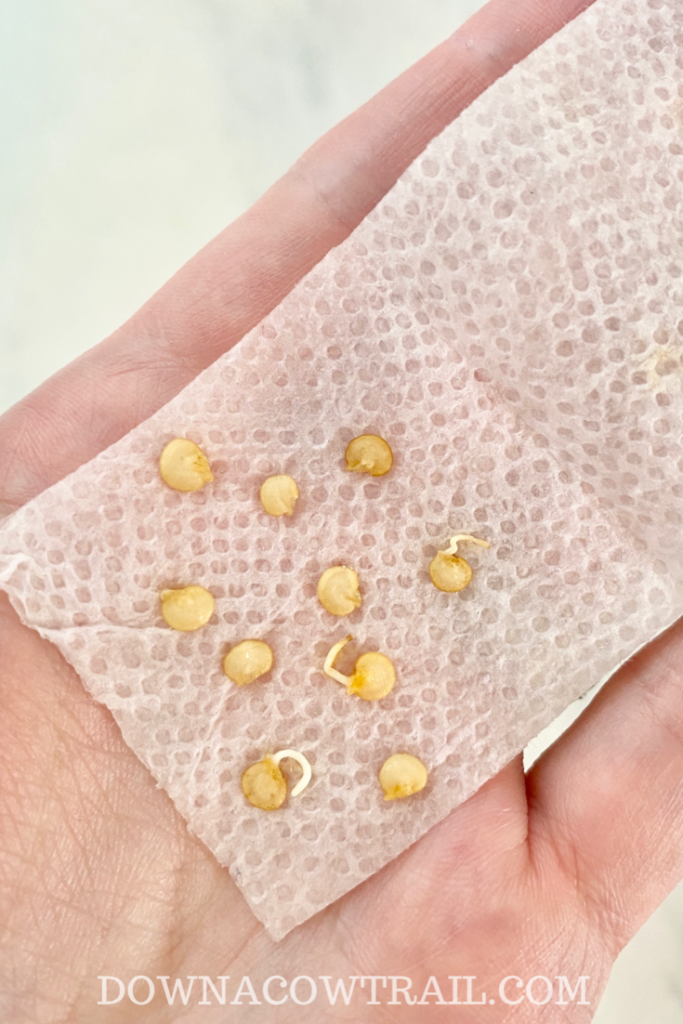
Some seeds will take longer than others. Older seed might take longer than fresh seed. Bigger seeds may take longer than smaller seeds. Part of the fun of pre-sprouting is the experiment and learning as we go!
Planting as they sprout
The last (and my favorite) benefit is that I can plant as the seeds sprout. I love this aspect as it just takes me a couple minutes every day to plant and label the new seedlings instead of mass planting a ton of seeds at once.
Supplies you need for pre-sprouting:
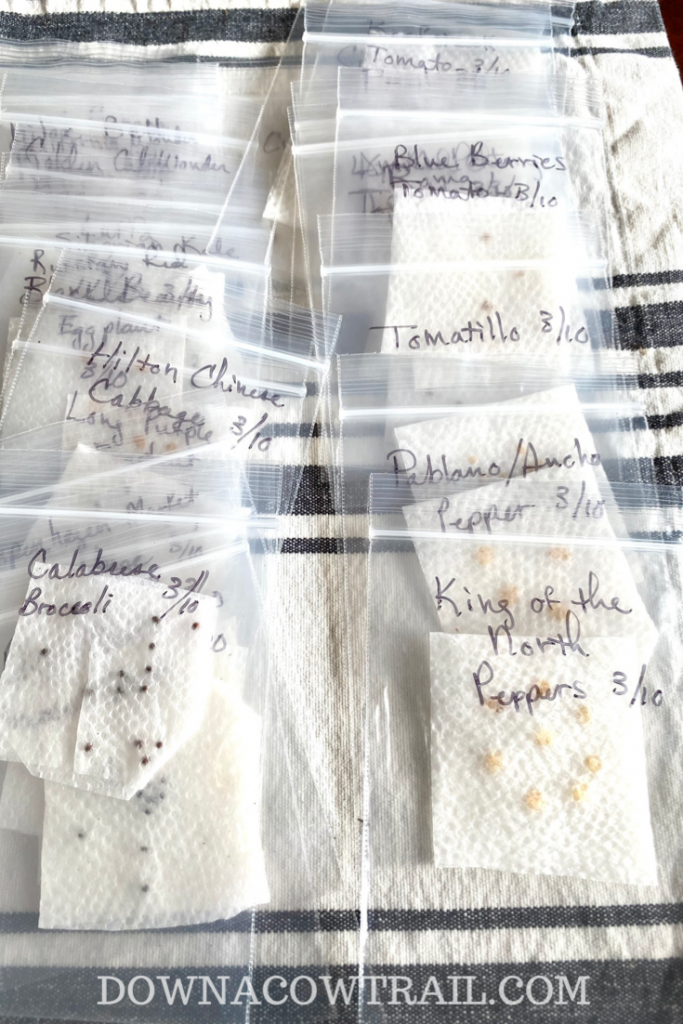
- Seeds
- Little clear sealable bags
- Permanent Marker
- Paper towels
The process to pre-sprout seeds is simple!
Before you begin, figure out how many seedlings you’ll need. If your seed is new you should have a good germination rate. If it’s older you’ll need to factor that in and add extra seeds to increase your chances of germination.
The process
First, label your little bags with the seed name, date, and how many seeds your included (good for reference).
Second, cut your paper towels into strips that will fit easily into your bags. I cut mine into 1.5” strips. Allow enough length on your paper towel to fold it in half.

Dampen your paper towel strips. Don’t get them soaking wet, just damp.
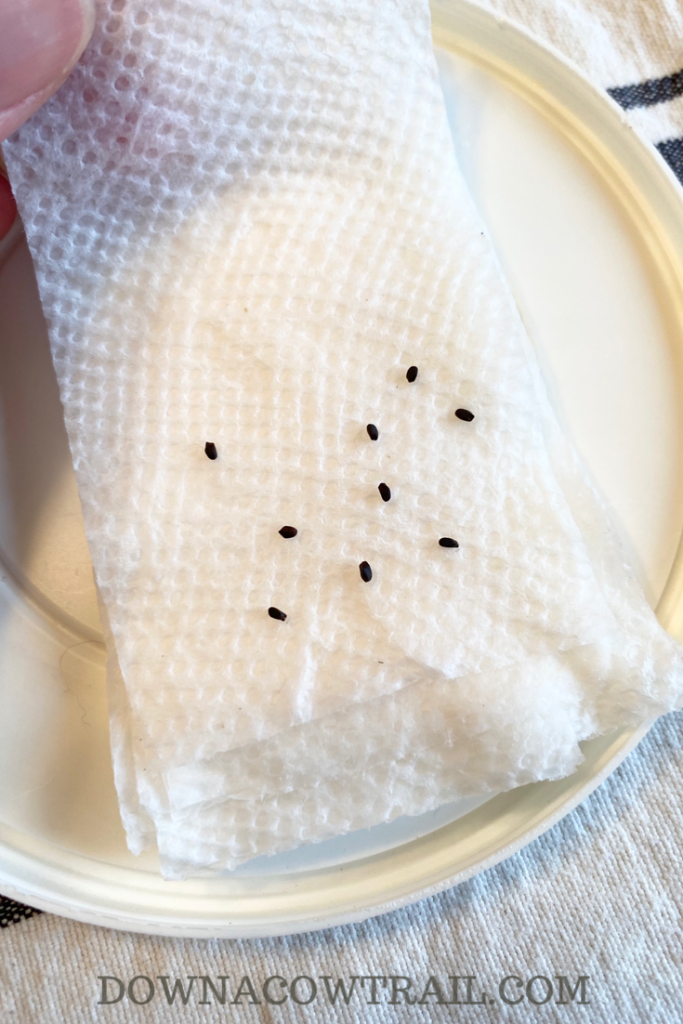
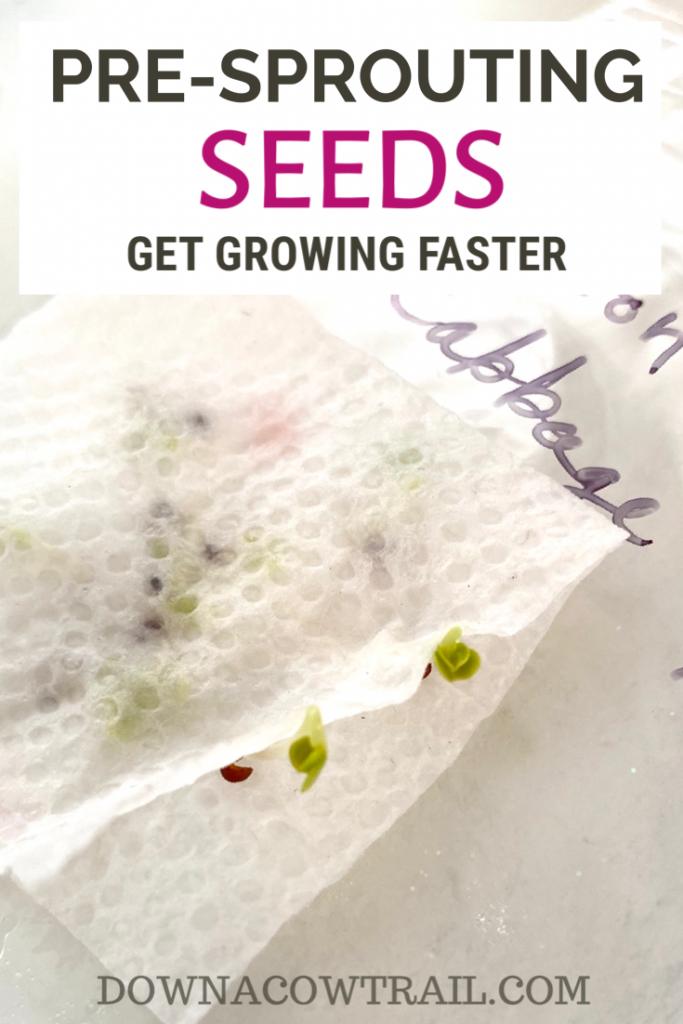
Place your seeds onto 1/2 of the damp paper towel. Spread them out a little if you can, this just makes it easier to pull them out later after they’ve sprouted. Fold the paper towel in half and then fold over the edges so the seeds don’t fall out. Place in your labeled bags, seal and you’re ready to get germinating!
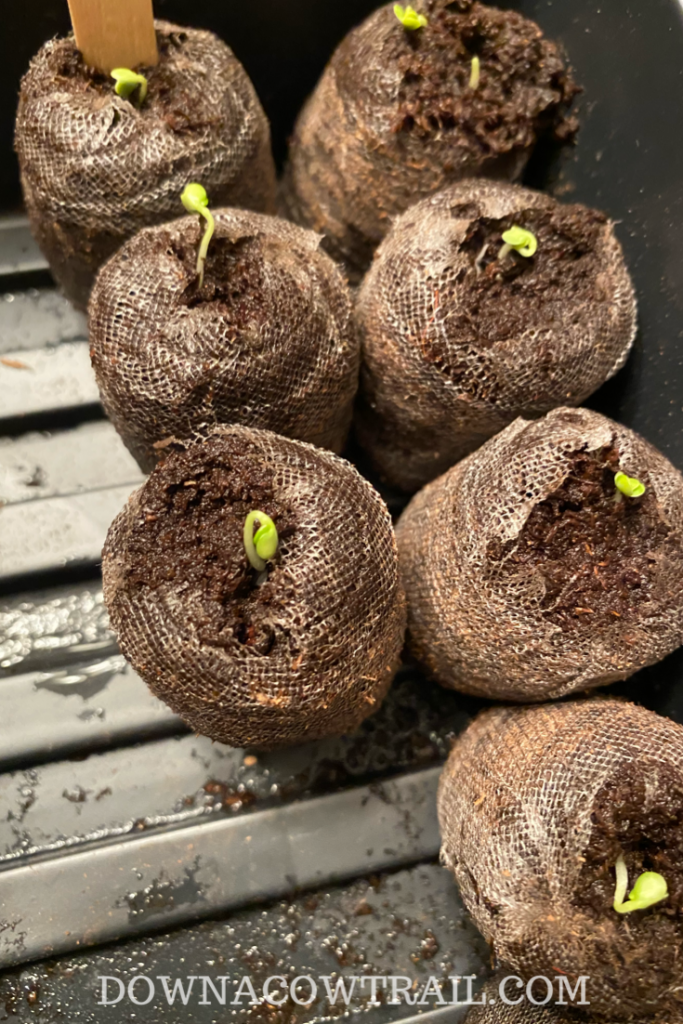
When it’s time for planting your newly sprouted seeds, very carefully remove them from the paper towel. It’s important to check them every day because ideally you want to catch them before the root gets long enough to grow through the paper towel.

Once it’s through the paper towel it can be difficult to pull the root out without damaging it. If it does grow through and you can’t gently pull it out, just cut around the root and plant the paper towel piece with it.

I like to use a toothpick to plant these tiny seedlings. Make a small hole in your planting medium, or peat pellet, and guide the root in with your toothpick. Be sure and label your seedlings!
Grow!
After all of your seedlings are transplanted to their new homes, it’s time to place them under a grow light or in a greenhouse to really get them growing! When they’re big enough, most of my starts end up in raised beds. Here’s a super easy tutorial to get your raised beds started!
If you find that time got away from you and you need to just order plant starts to get planted right away in the garden, Azure Standard has great organic, non-GMO plant starts. I have ordered a few because I wanted to test them out and they’re very healthy plants!
This process to pre-sprout seeds is so easy. Let me know how it goes for you!
Happy trails!
Tiffany
 Pressure Canning Carrots – Preserve carrots for years!
 Pressure Canned Black Beans – A Simple Guide
 Your Guide to Buying a Family Milk Cow
 DIY Chicken Coop Project – Part 1