This post may contain affiliate links. I may earn an affiliate commission if you click on a link and purchase an item at no additional cost to you. All opinions are my own.
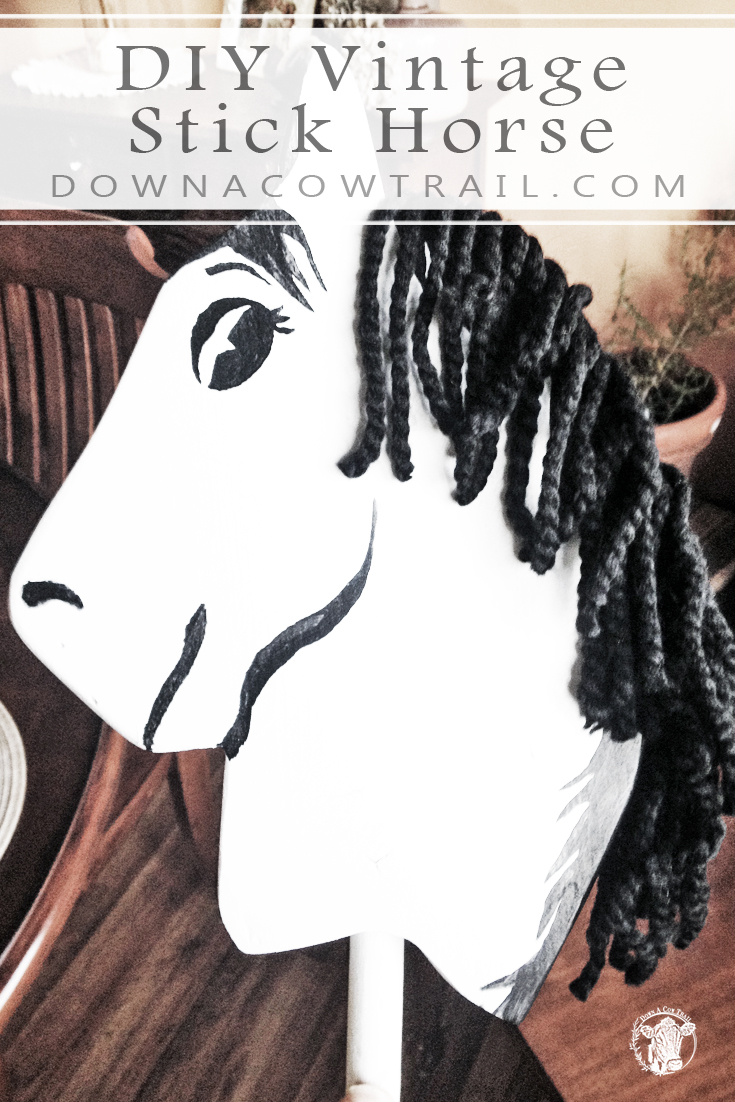
DIY Vintage Stick Horse
When our nephew turned 3, I decided to make him a vintage stick horse as a gift instead of buying one. I wanted it to be something he could hold onto and pass on. Growing up, my Dad made us girls each a stick horse. My Mom painted the faces and we made bridles out of hay string. Those were the days. The best days. And I wanted to pass on some of the nostalgia I suppose. So I decided to craft a vintage stick horse.
(Before I go on, be sure to follow me on Pinterest and Instagram!)
I searched online for a vintage horse head pattern, because in my head I knew what I wanted, the quintessential vintage horse. Vintage horses have a special place in my heart, like the vintage rocking horse I restored. I found one picture of an antique horse head and decided to sketch it out. I had to use two pieces of printer paper taped together to fit it all on. The next part would be transferring the outline onto wood. I used a white chalk pencil to outline over the graphite so we could see what we were cutting.
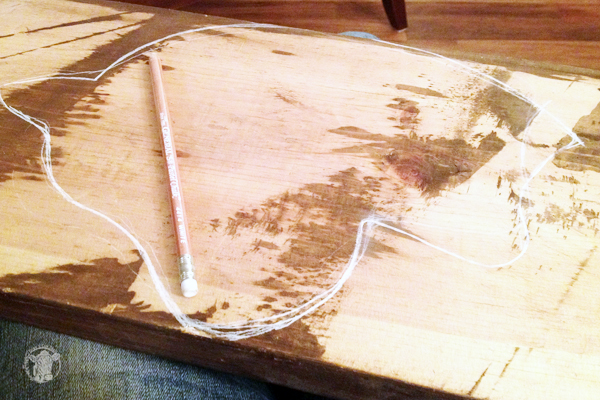
My Father-in-law found me a scrap piece of 2×10 from one of their fence projects and a 3/4″ wooden dowel. I got to work transferring the image. The easiest way I know how is a way my art teacher taught me when I was a child. Use a graphite pencil on the BACK of the paper along the outline, then lay your paper face up on the wood. Using a ballpoint pen, trace the lines of the horse and you SHOULD see a graphite transfer line on the wood.
The Reccciiiipppprocccating Saw
Of course, I started this project the day before the birthday party, so I was under the gun. At this point in time I didn’t have my jigsaw or an easy way to cut the horse’s head out. My husband brought up a reciprocating saw. This was the dangerous part, and if you know how this tool works, you know it is a very aggressive saw. It likes to rattle, move, and jolt the piece that you’re cutting. If you have it clamped down to a work table, then you’d be fine, but we didn’t have one at our disposal at this time. It took two of us to get this done, and thankfully we didn’t lose any fingers and my teeth are still in my head. My suggestion is to use clamps and a jigsaw.
Sand It Smooth
The next part was sanding down the head so it actually looked like a horse. At this point it was pretty rough. A reciprocating saw doesn’t exactly make smooth cuts. I used my trusty Ryobi palm sander to get the job done. She was smooth and actually resembled a horse now!

My husband drilled the hole to insert the wooden dowel. We used wood glue to secure it, and I also ran a short nail into the side just for good measure. No cowboy wants his horse to fall out from underneath him.
Paint
I painted the head white and let dry. I began to paint the face features using some acrylic paint I had left over from college. She was getting quite pretty now.
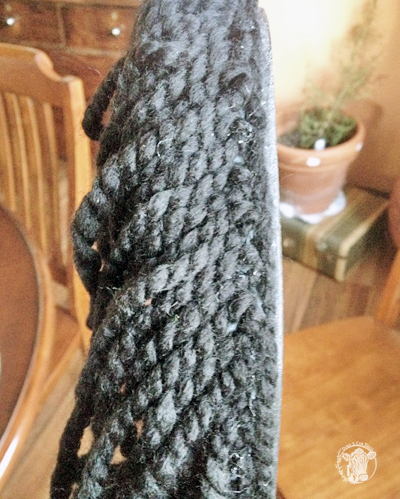
A Ball of Yarn
I painted the mane, but decided that I also wanted to add a little more texture. Flat hair did not flatter her. Going to my craft closet, I found some black yarn. I looped it along the topline and hot glued it down.
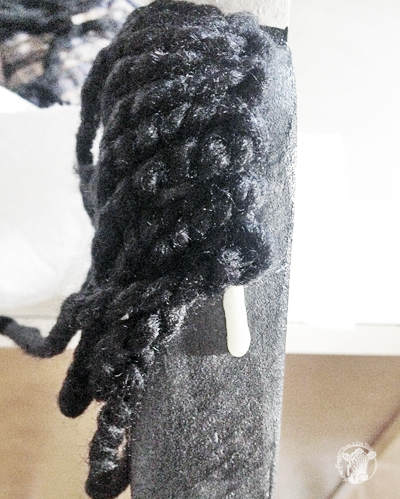
I waited to cut the loops until I had everything glued down. This way I didn’t end up with yarn pieces all over my house.

I attached the “reins” with short 1/2″ nails. In hindsight, and on my next project I will probably drill a hole clear through and run the reins through so they make a loop.
Now I need to make a vintage stick horse for my daughter. A winter project!
Happy Trails!
Tiffany
 10 Last Minute Gift Ideas for the Homesteader
 DIY Floor Length Mirror
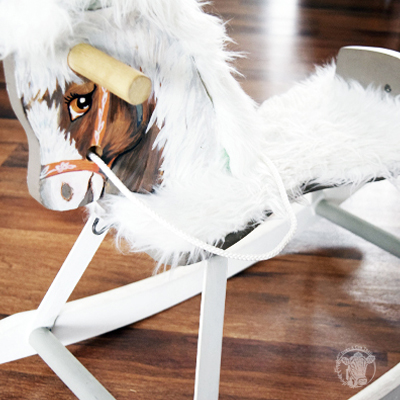 DIY Vintage Rocking Horse Makeover
 The Water Truck Lady